Why Trellising Changes Everything
Growing vegetables vertically isn't just a space-saving trick. It's a fundamentally different way of thinking about the garden. When plants climb, air circulates through their foliage instead of pooling underneath it. Fewer fungal diseases take hold. Fruit hangs freely rather than rotting against damp earth. You can see what you're harvesting — no more crouching into a tangle of leaves hunting for hidden zucchini the size of a baseball bat.
For small gardens especially, a trellis is a force multiplier. A 4-foot by 4-foot raised bed that grows sprawling squash horizontally might yield a handful of plants. Train those same squash up a 6-foot trellis and you've effectively tripled your growing area without adding a square inch of ground space.
Beyond yield, there's the matter of maintenance. Trellised plants are simply easier to manage. Pruning, inspecting for pests, harvesting, watering at the base — all of it becomes less of a contortion act and more of a pleasant, upright activity. Your back will thank you before September arrives.
Know Your Plants Before You Build
Not all vegetables climb the same way, and the trellis you build should reflect how your crops actually grow. This is the step most first-time builders skip, and it leads to mismatches — flimsy netting holding up a 30-pound watermelon, or a heavy cattle-panel arch over wispy pea tendrils that never needed it.
Tendril Climbers
Peas, cucumbers, and melons grab onto structures with delicate tendrils — thin, curling threads that wrap around any support they can find. These plants love thin supports: mesh netting, twine grids, wire fencing. They can't grip a thick 2x4 post, but they'll happily wind themselves around a piece of jute twine.
Twining Climbers
Beans — both pole beans and runner beans — are twiners. The entire growing tip of the plant rotates as it grows, searching for something to wrap around. Beans do well with bamboo poles, wooden stakes, or the classic teepee structure. They're vigorous and fast, often reaching 8 to 10 feet, so build tall.
Heavy-Fruited Climbers
Squash, large cucumbers, and indeterminate tomatoes produce substantial weight as the season progresses. These plants need structural support — not just something to grow along, but something that can bear load. If you're growing large fruit vertically, plan for slings: strips of fabric or mesh that cradle individual fruits and transfer their weight back to the trellis frame.
Non-Climbers That Benefit from Support
Tomatoes — determinate varieties in particular — don't technically climb. But they grow tall and heavy, and without support they fall over and sprawl. Pepper plants, eggplant, and even tall varieties of kale benefit from caging or staking. These aren't climbers, but they're absolutely candidates for support structures.
Choosing Your Trellis Type
Before you buy lumber or dig a single post hole, decide which style of trellis fits your garden. Each has distinct advantages, and the best choice depends on your vegetable list, available space, and how permanent you want the structure to be.
The A-Frame Trellis
Two panels of netting or wire mesh hinged at the top form an inverted V. Plants grow up both sides. This design is self-supporting — no posts to drive into the ground — and it folds flat for winter storage. It works beautifully for cucumbers, peas, and short-season beans. The downside is height limitation: most A-frames top out around 5 feet, which suits many crops but won't satisfy pole beans or indeterminate tomatoes.
Best for: Cucumbers, peas, short beans, small squash
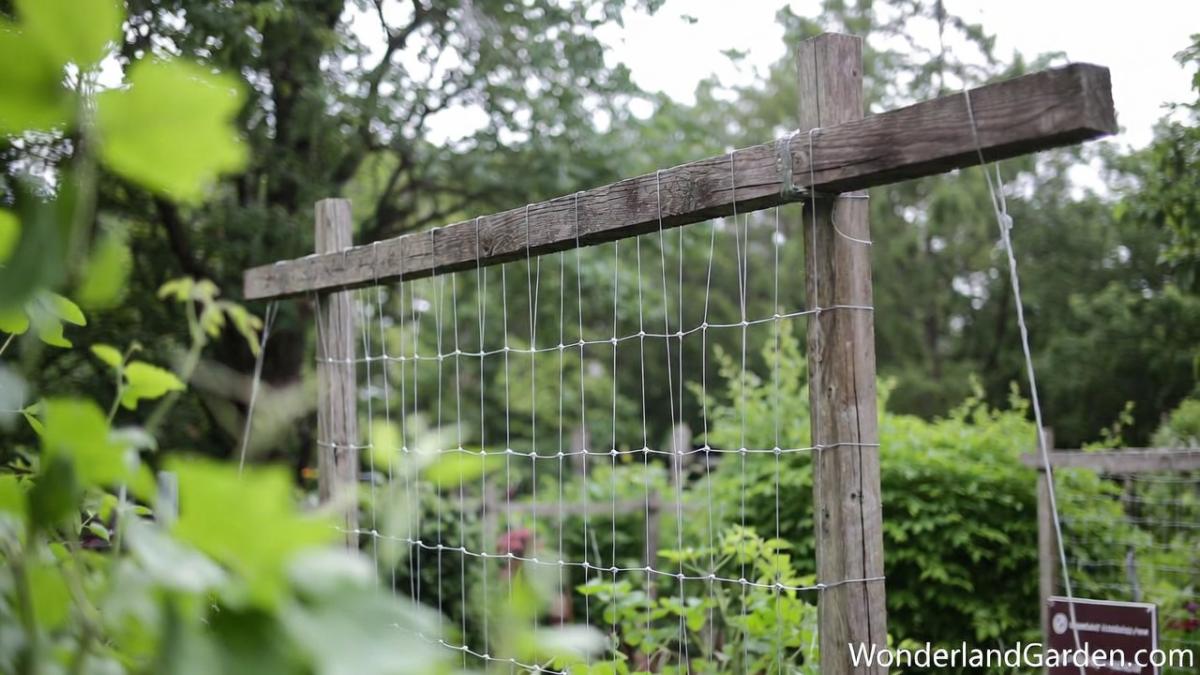
The Flat Panel Trellis
A rectangular frame — wood or metal — strung with horizontal wire, netting, or vertical twine. Mount it between two posts driven into the ground, or attach it directly to a raised bed's end boards. Flat panels are the workhorses of the kitchen garden: adaptable, easy to build, scalable in height and width. They're the right choice when you're growing a row of climbing vegetables along a bed.
Best for: Pole beans, peas, cucumbers, indeterminate tomatoes
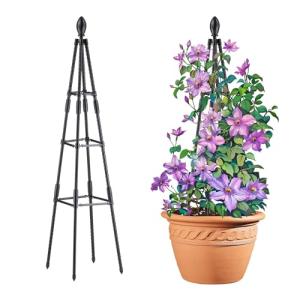
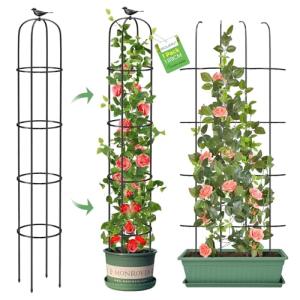
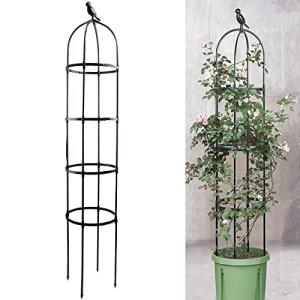
The Teepee or Pole Structure
Three to six bamboo canes or wooden poles, gathered and lashed at the top, fanned out at the base. Classic for a reason: it's inexpensive, takes minutes to assemble, requires no tools beyond string, and can be disassembled in autumn and stacked in a shed. Beans are its natural partner. In a potager or kitchen garden with aesthetic ambitions, a teepee of scarlet runner beans is genuinely beautiful — covered in red flowers from midsummer through frost.
Best for: Pole beans, runner beans, small-fruited cucumbers
The Cattle Panel Arch
A cattle panel — those 16-foot-long, rigid galvanized wire panels sold at farm supply stores — bent into an arch and anchored with T-posts creates one of the most durable and capacious trellis structures a home gardener can build. The arch forms a tunnel; you walk through it to harvest from both sides. It's strong enough for winter squash, melons, and heavy cucumber loads. The investment is higher upfront, but a cattle panel arch can outlast the garden beds beneath it.
Best for: Winter squash, melons, large cucumbers, pumpkins (small varieties)
The String Trellis (Florida Weave or Single-Stake)
Popular with tomato growers, the string trellis uses posts driven at intervals along a row, with horizontal strings woven between plants as they grow taller. It requires no cage or individual stake per plant — instead, the row of plants is corralled collectively. The Florida weave is a slightly more elaborate version where twine zigzags in a figure-eight pattern between plants and posts. Both methods are economical and effective for high-volume tomato growing.
Best for: Tomatoes, peppers (with modification)
Trellis Comparison at a Glance
| Trellis Type | Best Crops | Height Range | Cost | Durability | DIY Difficulty |
|---|---|---|---|---|---|
| A-Frame | Cucumbers, peas, beans | 4–5 ft | Low–Medium | Medium | Easy |
| Flat Panel | Beans, peas, tomatoes, cucumbers | 4–8 ft | Low–Medium | High | Easy–Moderate |
| Teepee/Poles | Pole beans, runner beans | 6–8 ft | Very Low | Low (seasonal) | Very Easy |
| Cattle Panel Arch | Squash, melons, cucumbers | 5–6 ft (arch) | Medium–High | Very High | Moderate |
| String/Florida Weave | Tomatoes, peppers | 4–6 ft | Very Low | Low (seasonal) | Easy |
| Wire Cage | Tomatoes, peppers, eggplant | 3–5 ft | Low | Medium | Very Easy |
Materials — What to Buy, What to Skip
Wood
Untreated pine is cheap and easy to work with but will rot at ground contact within two or three seasons. Cedar and redwood are the premium options — naturally rot-resistant, beautiful, and able to last a decade or more with minimal maintenance. Pressure-treated lumber is durable but contains preservatives you may want to keep away from edible crops. If you use it, stick to modern formulations (ACQ or CA-B rather than older arsenic-based CCA treatments) and avoid direct contact between treated wood and soil in beds.
For most home gardeners building a flat panel trellis, 1x2 or 1x3 cedar furring strips for the frame and cedar posts for ground anchoring hit the sweet spot between cost and longevity.
Metal
Galvanized steel is the gold standard for hardware cloth, wire mesh, and cattle panels. It doesn't rust at meaningful rates, handles weight and tension without deforming, and cleans up easily between seasons. Rebar stakes and T-posts are workhorses for anchoring structures in native soil — drive them with a fence post driver and they'll outlast whatever grows next to them.
Avoid cheap, ungalvanized wire. It rusts within a season, weakens, and stains both your hands and any fruit it touches.
Bamboo and Natural Materials
Bamboo canes are excellent for teepees and single-stake support. They're lightweight, strong for their diameter, and inexpensive in bulk. The caveat is longevity — untreated bamboo left in the soil degrades within two to three years. For seasonal structures that get stored indoors over winter, that's perfectly acceptable.
Jute twine is the right string for most trellis work: it's strong enough to support plants through the season but biodegradable, so you can cut it and compost the whole mess — plant residue and all — at the end of the year. Avoid plastic twine for anything you'll compost.
Netting
Plastic netting (polypropylene mesh) is inexpensive and widely available. It works, but it tangles easily at season's end, making cleanup miserable. Many growers find that after one season fighting dead vines out of plastic mesh, they switch to jute or cotton netting that can be composted, or to wire hardware cloth that can be hosed down and reused.
For permanent trellis frames, 14-gauge galvanized wire hardware cloth in 4-inch or 6-inch squares is the most serviceable material. It's rigid enough to hold its shape, strong enough for heavy crops, and easy to train plants through.
Building a Flat Panel Wood-and-Wire Trellis — Step by Step
This is the most versatile trellis for the home vegetable garden. The instructions below produce a 4-foot-wide by 6-foot-tall panel — scale the dimensions to your space.
What You'll Need
- Two cedar 4x4 posts, 8 feet long (buried 2 feet, leaving 6 feet above ground)
- Two cedar 1x3 boards, 4 feet long (top and bottom horizontal rails)
- 14-gauge galvanized wire or hardware cloth
- Fence staples or U-nails
- Post-hole digger or digging bar
- Level
- Drill and screws (1.5-inch exterior screws)
- Wire cutters
- Gravel (for post drainage)
Step 1 — Mark and Dig the Post Holes
Measure 4 feet between post centers. Dig holes 2 feet deep — deeper if your soil is sandy or loose. Add 3 to 4 inches of gravel at the bottom of each hole for drainage. This simple step extends post life significantly by preventing water from pooling against the wood.
Step 2 — Set the Posts
Lower the first post into its hole. Use a level to plumb it in two directions. Have a helper hold it while you backfill in layers, tamping the soil firmly every few inches. Repeat for the second post. Check that both posts are at the same height — a string line or a long level laid across the tops confirms alignment.
Allow posts set in concrete (optional, for very permanent installations) to cure for 24 hours before adding any load.
Step 3 — Attach the Horizontal Rails
Screw the top 1x3 board across the tops of both posts, flush with the top surface. Screw the bottom 1x3 board 6 inches above ground level — this keeps the lower rail from staying perpetually wet.
Pre-drilling prevents cedar from splitting. Two screws per post-rail connection is sufficient.
Step 4 — Run the Wire
Unroll your hardware cloth or cut it to span the full 4-foot width. Staple it to the inside face of the top rail first, pulling it taut before stapling along the bottom rail. If using individual wire runs rather than hardware cloth, start at one end and run wires horizontally every 6 inches, looping and twisting at each post.
Bend any sharp wire ends back against the frame with pliers. This is not optional — wire ends at eye level, in a garden you walk through daily, will eventually catch your face or arm in an unpleasant way.
Step 5 — Optional Finishing
Sand any rough edges on the wooden frame. Apply a coat of linseed oil or exterior wood finish to the cedar if you want to extend its life further. Paint is unnecessary but works fine if aesthetics matter and you have a color scheme to maintain.
Plant your seeds or seedlings at the base of the trellis and train the first tendrils or stems toward the support as they emerge. Within a week, most climbing vegetables find their own way.
Anchoring Trellises in Raised Beds
Raised beds present a specific challenge: you can't drive posts into deep native soil the same way. The workarounds are straightforward.
The cleanest approach is to attach trellis posts directly to the inside face of the raised bed's end boards, using heavy-duty brackets or simply bolting through. A 4x4 post bolted through a 2-inch thick raised bed wall, secured with a washer and nut, is surprisingly solid.
Alternatively, use metal conduit or rebar stakes that you drive through the bed and into the native soil below. Slip your wooden posts or bamboo canes over them for a connection that transfers load into the ground. This works especially well for beds 12 inches or deeper.
For lightweight trellises supporting peas or thin-stemmed beans, two T-posts hammered into the native soil just outside the raised bed's perimeter, with a panel of netting stretched between them, requires no woodworking at all.
Seasonal Care and Maintenance
During the Season
Check trellis anchors after heavy rain or wind events. Wooden posts absorb and release moisture, which can loosen them in their holes over time. A quick check and a few minutes of tamping with a digging bar keeps them solid.
As plants grow, gently tie any stems that wander away from the structure back toward it. Soft ties — cloth strips, flexible plant tape — work better than wire or zip ties, which can cut into stems as they thicken.
For heavy fruiting crops on a vertical trellis, add fabric slings when individual fruit reaches baseball size. A strip of old t-shirt or a mesh produce bag tied to the trellis and cradling the fruit prevents stem breakage.
End of Season Cleanup
Remove dead plant material promptly. Leaving diseased vines tangled in a trellis over winter provides a breeding site for fungal spores and pest eggs that will greet you in spring. Cut plants at the base rather than yanking — yanking strains connections and can loosen posts.
Hose off wire and metal components before storage. Dry wood surfaces if possible before covering for winter.
Reusable netting benefits from a brief soak in dilute bleach solution (one part bleach, nine parts water) to kill any lingering pathogens, followed by a thorough rinse and complete air drying before storage.
Common Mistakes and How to Avoid Them
Building too short. Pole beans will reach 10 feet given the chance. Cucumbers on good soil easily hit 8. Err on the side of height — a plant that outgrows its trellis has nowhere to go but sideways, defeating the whole purpose.
Skimping on post depth. Two feet is the minimum for a 6-foot post. Three feet is better for anything 7 feet or taller, or for structures supporting heavy crops in windy locations. The math is simple: below-ground depth should be roughly one-third of total post height.
Using the wrong netting for the crop. Fine-mesh netting is frustrating for large-leafed squash. Wide-mesh hardware cloth is useless for pea tendrils, which slip straight through. Match the mesh opening to the crop's growth habit.
Forgetting future access. A trellis that runs down the center of a narrow path creates a wall you can't harvest from without contorting. Position trellises to allow 18 to 24 inches of working space on at least one side.
Not planning for removal. If your trellis is too permanent, rotation becomes difficult — you can't move the nightshades to a new bed when there's a fixed trellis where the legumes need to go. Build in flexibility: removable panels, posts that slide out of sleeves, structures that disassemble in an hour.
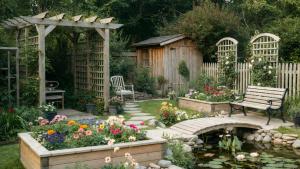
The Aesthetic Dimension
There's a case to be made — a genuinely compelling one — for thinking about trellis design beyond pure utility. The kitchen garden has always been a space where the functional and the beautiful coexist. An arched cattle panel covered in Tromboncino squash, its long trailing fruits hanging like pendulums, is something people stop to photograph. A teepee of purple runner beans in flower doesn't belong in a utilitarian tool shed — it belongs where you can see it from the kitchen window.
If you're building a raised bed garden from scratch, consider how your trellis structures will define the visual geometry of the space. Repeating arches create rhythm. Flat panels running east-to-west along a bed's back edge catch morning light and create a green wall by midsummer. A central teepee in a square bed becomes a focal point, visible from the house, commanding the garden the way a sundial once commanded the formal parterre.
The vegetables are the point, of course. But a well-built trellis is also a piece of modest architecture, and modest architecture done thoughtfully is its own quiet pleasure.
Final Thoughts
A trellis is not a complicated project. With a post-hole digger, a drill, some cedar boards, and a roll of wire, you can build something that will serve your garden for a decade and transform how your climbing vegetables grow. The investment of an afternoon returns dividends in healthier plants, easier harvests, and a garden that uses its vertical space as intelligently as its horizontal ground.
Start simple. A flat panel between two posts, strung with wire, serves most crops well. Learn what your plants need over a season or two, then build toward more elaborate structures — arches, teepees, multi-bay panel systems — as your confidence and appetite grow. The principles don't change: strong posts, tension in the wires, height enough for the crop, and clearance enough for you.
Get that right, and everything climbing in your garden has a place to go.
Whether you're growing the first pea vine of spring or the last squash of October, a well-built trellis is the difference between a garden that fights you and one that works with you. Build it once, build it right, and let the plants do what they've always wanted to do — climb.